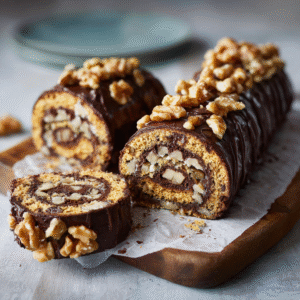
You ever find yourself staring at your pantry, half-hoping dessert might just materialize? No time, no energy, and definitely not in the mood to preheat the oven. I’ve been there — more than I care to admit. That’s where this no bake biscuit roll sneaks in like a culinary miracle.
Now, I know what you’re thinking: another “easy dessert” claim? But hear me out. This one? It actually delivers. Crumbly biscuits (or graham crackers if you’re in the States) get wrapped up with a creamy, customizable filling into a log that looks impressive, tastes nostalgic, and requires absolutely zero oven time.
Whether you’re craving something sweet on a Tuesday night or need a last-minute treat for guests, this no bake biscuit roll is the kind of back-pocket recipe you’ll be glad you saved. We’ll walk through the ingredients, the step-by-step (don’t worry, it’s chill), and a few clever twists in case you feel like showing off a bit.
If you’re into low-effort desserts that don’t skimp on taste, you’ll want to bookmark this one — and maybe check out our 3-ingredient no bake cookies while you’re at it.
Table of Contents
Table of Contents
Why You Might Fall for This No Bake Biscuit Roll
I’ll admit it — I didn’t expect much the first time I made this. Biscuits? No oven? It just felt… too easy to be impressive. But then something happened. The texture, the way it slices so neatly, the surprise on people’s faces when they taste it — it stuck.
And now, it’s quietly become one of my go-to desserts. Not just because it’s simple (although, yes, it is), but because it feels like more than the sum of its parts.
Some reasons it keeps getting made in my kitchen:
- Sometimes, not baking is the real treat — especially when it’s 85°F and the idea of preheating anything sounds criminal.
- You can tweak it endlessly. Cocoa one week, crushed Biscoff or peanut butter the next. No two rolls have to taste the same.
- It holds up — literally and figuratively. I’ve made it the night before a dinner party and it still tastes like I just rolled it.
- Even picky eaters go back for seconds. And the kids? They love helping press the dough and lick the spoon.
Honestly, there’s a kind of calm joy in a recipe that doesn’t fight back. This one just works — and once you try it, you’ll see what I mean.

No-Bake Chocolate Biscuit Roll
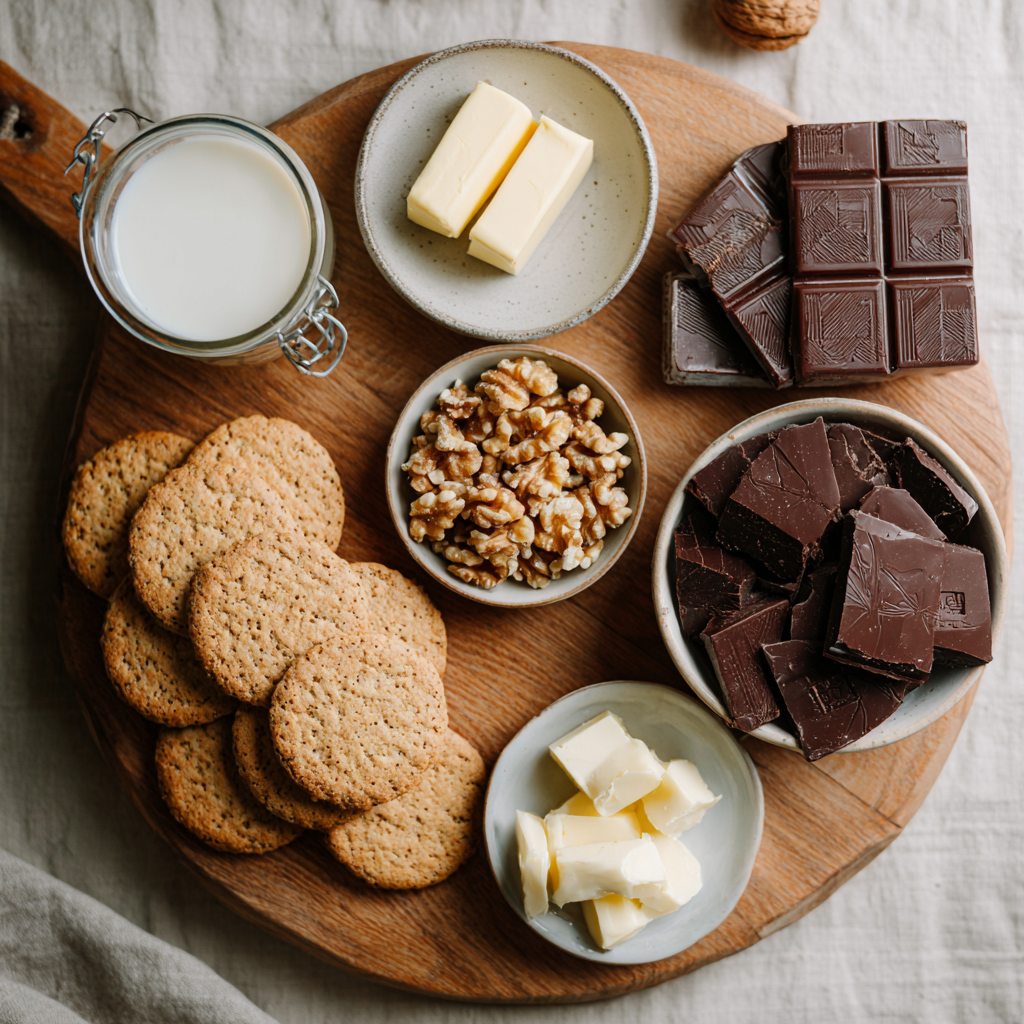
Ingredients
- 30 digestive biscuits approx. 180g
- ¾ cup walnuts 75g, chopped
- 1¼ cups dark chocolate 200g, chopped
- ¾ cup unsalted butter 185g
- 6 tablespoons milk 90ml
Instructions
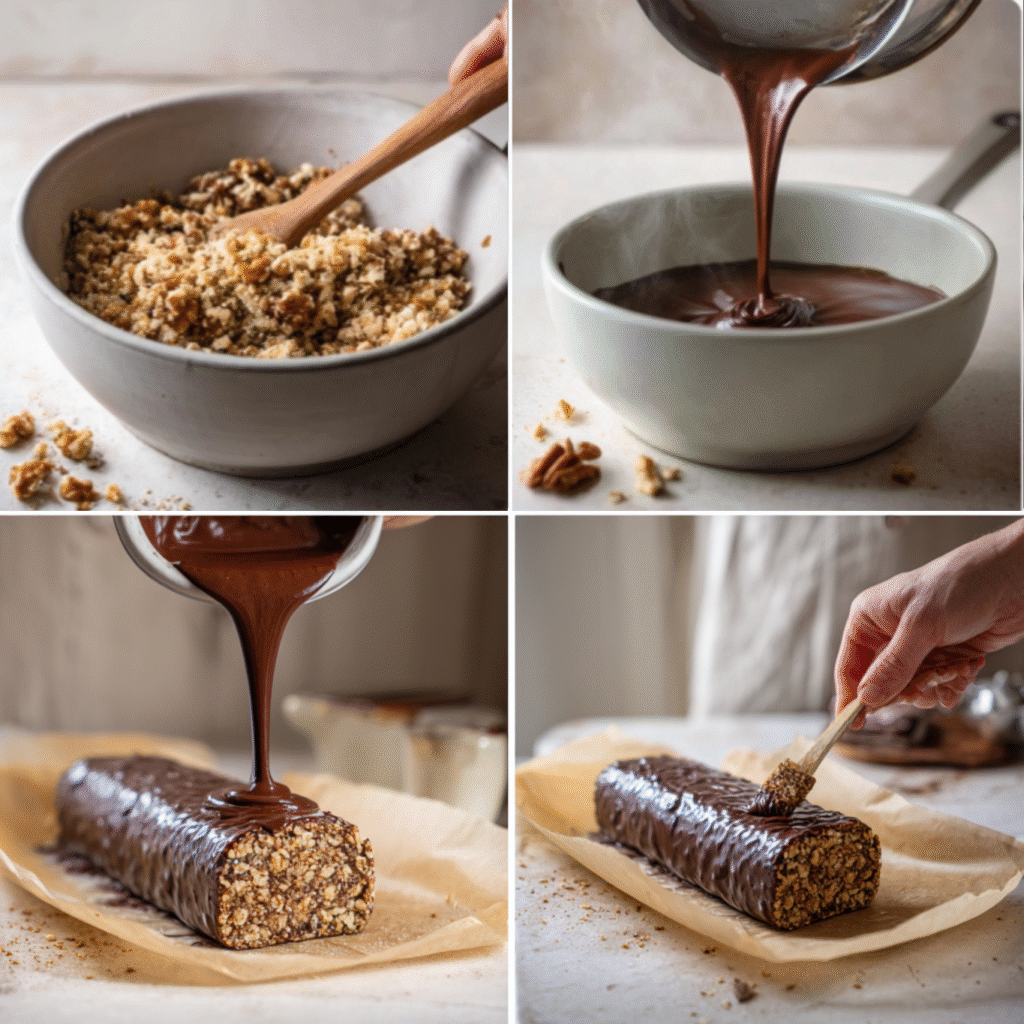
- Break the digestive biscuits into small pieces and place them in a large mixing bowl. Add the chopped walnuts and mix well.
- In a saucepan over low heat, melt the butter and chopped dark chocolate together. Once melted, remove from heat and stir in the milk until smooth.
- Pour the chocolate mixture over the biscuits and nuts. Stir thoroughly until all dry ingredients are well coated.
- Place a large sheet of cling film or parchment paper on a flat surface. Shape the mixture into a log and wrap tightly.
- Refrigerate the wrapped log for at least 4 hours, or until firm.
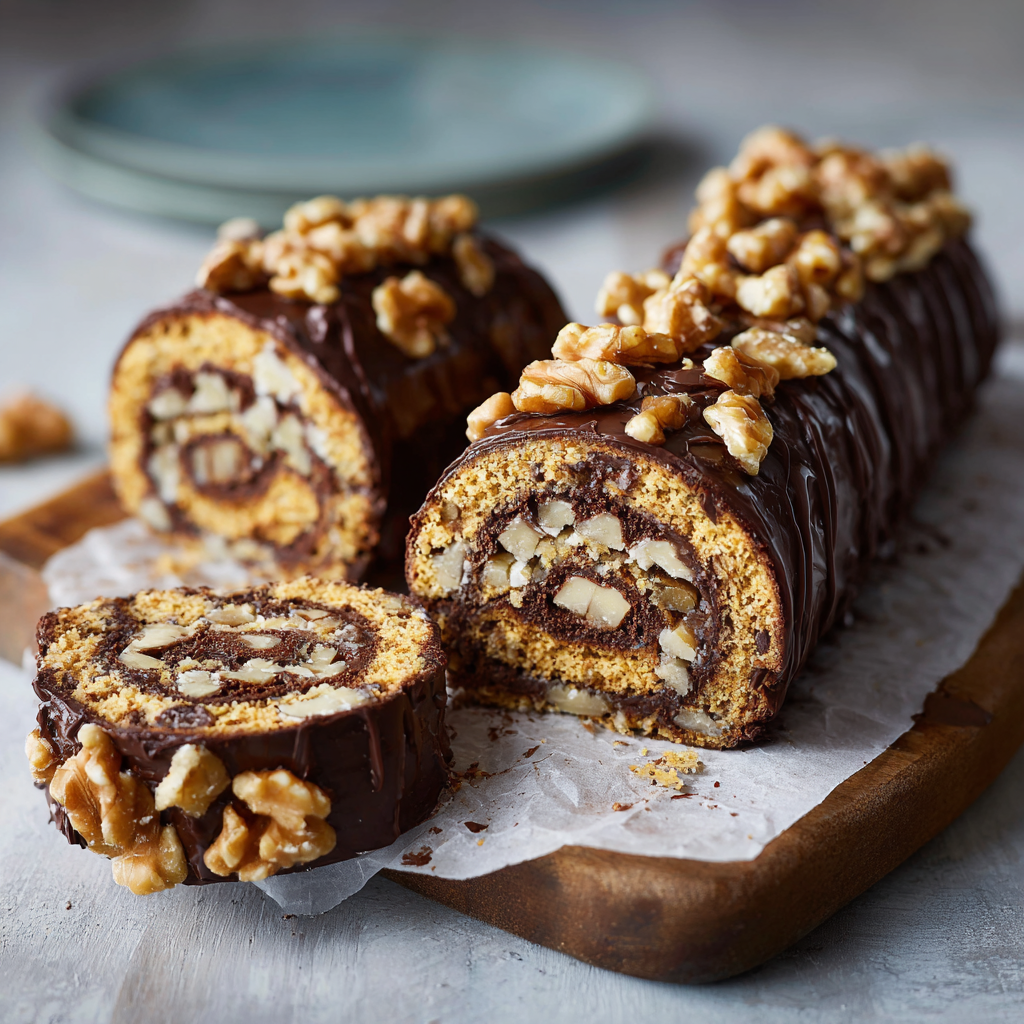
- Unwrap and slice into discs before serving. Optional: dust with icing sugar.
Notes
- To prevent crumbling, crush biscuits into fine pieces.
- For clean slices, use a knife warmed under hot water and wiped dry.
- Variations: swap walnuts for hazelnuts, add citrus zest to the mix, or blend in a swirl of peanut butter.
Nutrition
(Nutrition is estimated and will vary based on actual ingredients used)
Ingredients You’ll Need for the Perfect No Bake Biscuit Roll
If you’ve ever craved dessert without turning your kitchen into a sauna, this no bake biscuit roll will feel like a small victory. The ingredients? Shockingly simple — most are probably in your pantry right now.

Here’s what you’ll need:
- 200g digestive biscuits (graham crackers work too — classic base for any no bake dessert)
- 2 tablespoons cocoa powder (optional, but adds richness to the biscuit roll)
- 100g unsalted butter, melted
- 2 tablespoons sugar (white, brown, or even coconut sugar if you’re tweaking it)
- 100ml milk (whole is best, but oat or almond milk will do the job)
For the filling:
- 100g unsalted butter, softened
- 100g powdered sugar
- 1 teaspoon vanilla extract
- Optional extras: shredded coconut, crushed hazelnuts, or a swirl of peanut butter for depth
This ingredient list makes one compact, sliceable biscuit roll — no oven, no water bath, no drama. The structure is forgiving, which means you can sub ingredients without ruining the whole roll.
A few quick notes:
- Going dairy-free? Swap butter for plant-based margarine, and use almond or soy milk.
- Trying gluten-free? A crispy GF biscuit (not soft cookies) works great.
- Want to make it your own? Add a dash of cinnamon, espresso powder, or even a little orange zest for a twist.
The best part? You’re already halfway to dessert the minute you gather these. Once you’ve made this no bake biscuit roll once, you’ll never look at leftover crackers the same way again.
Step-by-Step Instructions for a Flawless No Bake Biscuit Roll

This is where the magic happens. The good news? Making a no bake biscuit roll is more forgiving than most desserts. No ovens, no timers, no stress. Just follow along, and you’ll have a chilled, sliceable dessert ready before you know it.
1. Crush the biscuits
Start by turning your biscuits into fine crumbs. A food processor works wonders, but smashing them in a zip-top bag with a rolling pin gets the job done too (and honestly, a little stress relief never hurts).
Tip: Make sure the crumbs are fine, almost sandy — it helps everything hold together later.
2. Mix the base
In a large bowl, combine:
- Biscuit crumbs
- Cocoa powder
- Sugar
Stir well before pouring in the melted butter and milk. Mix until you have a thick, pliable dough — almost like cookie dough but softer.
If it feels too dry, add another splash of milk. Too wet? A handful more crushed biscuits does the trick.
3. Roll it out
Place the dough between two sheets of parchment paper and roll it into a rectangle — about 1/4 to 1/2 inch thick. It doesn’t have to be perfect, but try to keep the edges somewhat even.
Pro move: Chill the flattened base for 10 minutes. It makes spreading the filling easier.
4. Make the filling
In a separate bowl, beat the softened butter and powdered sugar together until smooth. Add the vanilla extract and mix again.
Now’s the time to stir in any extras — coconut, chopped nuts, cinnamon, or even crushed cookies if you want a bit of crunch.
5. Assemble and roll
Spread the filling evenly over the biscuit base. Take your time here — uneven filling can cause the roll to crack later. Once it’s smooth, use the parchment paper to carefully roll it up into a tight log.
Wrap the roll in the same parchment paper and twist the ends like a candy wrapper. Pop it into the fridge for at least 2 hours (overnight is even better).
6. Slice and serve
Once firm, unwrap your chilled no bake biscuit roll and cut it into thick slices using a sharp knife. Serve as-is, or dress it up with a dusting of cocoa powder or a drizzle of melted chocolate.
Creative Twists on the Classic No Bake Biscuit Roll
The beauty of a no bake biscuit roll? It’s not just a one-flavor wonder. Once you get the hang of the base technique, you can remix it a dozen ways — sweet, spicy, nutty, fruity, you name it.
Here are some of my favorite spins:
Chocolate Hazelnut Dream
Swap part of the filling for a spoonful (or three) of chocolate hazelnut spread. It melts into the base and creates that irresistible swirl when you slice it.
Biscoff-Inspired Roll
Use Biscoff cookies instead of digestive biscuits for a caramel-tinged flavor. Blend crushed cookies into both the base and the filling for double the punch.
Pro Tip: Add a tablespoon of cookie butter to the center for a surprise middle.
Citrus Burst
Grate in some fresh orange or lemon zest into the filling — just a bit lifts the whole roll and adds brightness. Works beautifully with dark chocolate add-ins.
Vegan & Dairy-Free
Use vegan biscuits, plant-based butter, and a dash of oat or almond milk. Coconut cream makes an excellent rich filling base if you’re skipping traditional butter altogether.
Nutty & Textured
Chopped walnuts, almonds, or pistachios in the filling add crunch and depth. Toast them first for extra flavor, then fold in gently before rolling.
This kind of flexibility is what turns a simple biscuit roll into a signature dish. Honestly, once you try a few of these variations, it’s hard to stop. The base recipe becomes your canvas, and every tweak brings something new to the table.
Want to go even simpler or make it a festive crowd-pleaser? Pair this roll with one of our no bake 4th of July desserts for a firework-worthy sweet spread.
And if you’re looking for more no bake dessert ideas, take a peek at our Easy No-Bake Chocolate Pie — they pair beautifully with this one for dessert platters or holiday spreads.
Tips for the Perfect No Bake Biscuit Roll
Making a no bake biscuit roll is pretty low-stress — but if you’ve ever ended up with a cracked roll, uneven filling, or a base that won’t hold together, you’re not alone. Here are a few real-world tips to help your next one turn out smooth, sliceable, and impressive.
1. Don’t rush the chill
I know it’s tempting to slice into your roll early — the smell alone is a test of patience. But trust me, giving it enough time in the fridge (at least 2 hours, ideally overnight) makes all the difference. It firms up the shape, holds the filling in place, and makes slicing clean and easy.
2. Keep the crumbs fine
This one’s small, but it matters: crush the biscuits as finely as possible. Chunky crumbs can make the base break apart when you roll it. Think breadcrumb texture — soft, almost floury.
3. Balance the moisture
If your dough feels dry or cracks while rolling, add a teaspoon of milk at a time until it becomes smooth and pliable. On the flip side, if it’s sticky or gooey, mix in a few more biscuit crumbs.
4. Line your surface
Rolling directly on the counter? Risky. Always use parchment paper or cling film — not just for ease, but to help you shape the roll without losing half the filling along the way.
5. Use a warm knife to slice
Once your biscuit roll is firm, run your knife under hot water, wipe it dry, and slice. This prevents crumbling and gives you those clean, bakery-style edges.
And one more thing: this recipe isn’t just about following steps — it’s about feel. The dough should hold together but still bend; the filling should spread easily but not ooze. Once you’ve made a no bake biscuit roll once or twice, that intuition kicks in.
Looking for options that feel indulgent but stay on the healthier side? We’ve rounded up some of our favorite healthy no bake desserts that hit the sweet spot without the sugar overload.
Frequently Asked Questions
Can I make this no bake biscuit roll ahead of time?
Absolutely! Preparing the roll a day in advance allows it to set firmly, making slicing easier and enhancing the flavors. Simply wrap it tightly in parchment paper or plastic wrap and store it in the refrigerator until you’re ready to serve.
How long can I store the no bake biscuit roll?
The roll can be stored in an airtight container in the refrigerator for up to 5 days. For longer storage, wrap it securely and freeze for up to a month. Thaw in the refrigerator before slicing and serving.
Can I use different types of biscuits?
Yes, the recipe is quite versatile. While digestive biscuits are commonly used, you can substitute with graham crackers, Marie biscuits, or even Biscoff cookies for a unique flavor twist. Just ensure the biscuits are dry and crisp to maintain the roll’s structure.
Is it possible to make a vegan version of this no bake biscuit roll?
Certainly! Replace the butter with a plant-based alternative and use non-dairy milk such as almond or oat milk. Ensure the biscuits you choose are vegan-friendly. For the filling, consider using coconut cream or a vegan butter substitute.
My roll cracked while slicing. How can I prevent this?
To achieve clean slices, ensure the roll is well-chilled before cutting. Use a sharp knife, and for best results, warm the knife slightly under hot water, then wipe it dry before slicing. This technique helps in achieving smooth, crack-free cuts.
Conclusion
There’s something quietly satisfying about a dessert that asks so little of you, yet delivers every single time. The no bake biscuit roll isn’t just a recipe — it’s a bit of kitchen magic for days when you want sweet comfort without the oven drama.
Whether you’re making it for guests or sneaking a slice straight from the fridge, it’s the kind of treat that doesn’t overpromise, yet somehow overdelivers. And honestly? That’s the kind of recipe worth passing along.
Give it a try, make it your own, and don’t be surprised if it becomes a regular in your dessert rotation. If it does, well — now you know why.
If this no bake biscuit roll lands a permanent spot in your fridge, we’d love to see it! Snap a photo, tag us, or share it over on our Pinterest or Facebook page — we’re always drooling over your kitchen wins.


5 thoughts on “The Ultimate No Bake Biscuit Roll Recipe: Easy, Delicious, and Oven-Free”